The wxPython GUI toolkit comes with lots of widgets. We will be covering some widgets that are somewhat harder to get ones mind wrapped around. In this case, we will be talking about splitter windows. WxPython includes three types of splitter windows:
- wx.SplitterWindow
- fourwaysplitter which you can find in wx.lib.agw
- MultiSplitterWindow which you can find in wx.lib.splitter
In this article, we will go over how to use these different kinds of splitter windows. There is one other widget that behaves kind of like a splitter window that we won’t be talking about. It is the SplitTree widget which is a part of wx.gizmos. Feel free to check it out in the wxPython demo.
The wx.SplitterWindow
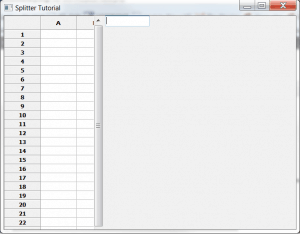
The wx.SplitterWindow is a wrapper around the C++ base wxWidgets widget, and probably the most common one you’ll see in the wild. Let’s write a quick piece of code to learn how to use it.
import wx
import wx.grid as gridlib

########################################################################
class LeftPanel(wx.Panel):
    """"""

    #----------------------------------------------------------------------
    def __init__(self, parent):
        """Constructor"""
        wx.Panel.__init__(self, parent=parent)

        grid = gridlib.Grid(self)
        grid.CreateGrid(25,12)

        sizer = wx.BoxSizer(wx.VERTICAL)
        sizer.Add(grid, 0, wx.EXPAND)
        self.SetSizer(sizer)

########################################################################
class RightPanel(wx.Panel):
    """"""

    #----------------------------------------------------------------------
    def __init__(self, parent):
        """Constructor"""
        wx.Panel.__init__(self, parent=parent)
        txt = wx.TextCtrl(self)

########################################################################
class MyForm(wx.Frame):

    #----------------------------------------------------------------------
    def __init__(self):
        wx.Frame.__init__(self, None, title="Splitter Tutorial")

        splitter = wx.SplitterWindow(self)
        leftP = LeftPanel(splitter)
        rightP = RightPanel(splitter)

        # split the window
        splitter.SplitVertically(leftP, rightP)
        splitter.SetMinimumPaneSize(20)

        sizer = wx.BoxSizer(wx.VERTICAL)
        sizer.Add(splitter, 1, wx.EXPAND)
        self.SetSizer(sizer)

#----------------------------------------------------------------------
# Run the program
if __name__ == "__main__":
    app = wx.App(False)
    frame = MyForm()
    frame.Show()
    app.MainLoop()
As you can see, we make the wx.SplitterWindow widget the only child of the frame. In most applications, you normally make the wx.Panel the only child, but this is a special case. Next we create a couple of panels and make them children of the wx.SplitterWindow. Then we tell the wx.SplitterWindow to SplitVertically and give it a minimum pane size of 20. You need to do set the size to make sure both panels are visible. The SplitterWindow can be bound to four different widget-specific events:
- EVT_SPLITTER_SASH_POS_CHANGING
- EVT_SPLITTER_SASH_POS_CHANGED
- EVT_SPLITTER_UNSPLIT
- EVT_SPLITTER_DCLICK
We don’t use any of them in this example, but you should be aware of them. It should also be noted that you can set the sash position.
The other piece that’s worth knowing about is that you can set the sash gravity. The gravity controls how the panes resize when you move the save. It’s default is 0.0, which means that only the bottom or right window is automatically resized. You can also set it to 0.5 where both windows grow equally or to 1.0 where only the left/top window grows.
Nesting Splitters
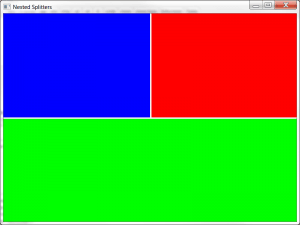
Occasionally you’ll want to nest splitter windows inside of each other to create complex layouts, like the one used in the wxPython demo. Let’s take a moment and find out how to do that with the following piece of code:
import wx

########################################################################
class RandomPanel(wx.Panel):
    """"""

    #----------------------------------------------------------------------
    def __init__(self, parent, color):
        """Constructor"""
        wx.Panel.__init__(self, parent)
        self.SetBackgroundColour(color)

########################################################################
class MainPanel(wx.Panel):
    """"""

    #----------------------------------------------------------------------
    def __init__(self, parent):
        """Constructor"""
        wx.Panel.__init__(self, parent)

        topSplitter = wx.SplitterWindow(self)
        vSplitter = wx.SplitterWindow(topSplitter)

        panelOne = RandomPanel(vSplitter, "blue")
        panelTwo = RandomPanel(vSplitter, "red")
        vSplitter.SplitVertically(panelOne, panelTwo)
        vSplitter.SetSashGravity(0.5)

        panelThree = RandomPanel(topSplitter, "green")
        topSplitter.SplitHorizontally(vSplitter, panelThree)
        topSplitter.SetSashGravity(0.5)

        sizer = wx.BoxSizer(wx.VERTICAL)
        sizer.Add(topSplitter, 1, wx.EXPAND)
        self.SetSizer(sizer)

########################################################################
class MainFrame(wx.Frame):
    """"""

    #----------------------------------------------------------------------
    def __init__(self):
        """Constructor"""
        wx.Frame.__init__(self, None, title="Nested Splitters",
                          size=(800,600))
        panel = MainPanel(self)
        self.Show()

#----------------------------------------------------------------------
if __name__ == "__main__":
    app = wx.App(False)
    frame = MainFrame()
    app.MainLoop()
Here we create a top-level splitter that is the only child of the frame. Then we create a second splitter and add a couple of panels to it. Next we split the second splitter vertically and the top splitter horizontally to get the application you saw at the beginning of this section. Now we’re ready to learn about our next type of splitter window!
The FourWaySplitter Widget
The FourWaySplitter widget is a custom widget, written in pure Python and is a part of the agw sub-library which can be found in wx.lib.agw. The agw stands for Advanced Generic Widgets, although I think it can equally stand for Andrea Gavana Widgets, the author of all the widgets in that sub-library. Regardless, this is very handy splitter in that you don’t need to do any nesting of splitter windows to get the same effect that this widget does by default. We’ll use an example from the wxPython documentation to see how we use this widget:
import wx
import wx.lib.agw.fourwaysplitter as fws

########################################################################
class MyFrame(wx.Frame):

    #----------------------------------------------------------------------
    def __init__(self):

        wx.Frame.__init__(self, None, title="FourWaySplitter Example")

        splitter = fws.FourWaySplitter(self, agwStyle=wx.SP_LIVE_UPDATE)

        # Put in some coloured panels...
        for colour in [wx.RED, wx.WHITE, wx.BLUE, wx.GREEN]:

            panel = wx.Panel(splitter)
            panel.SetBackgroundColour(colour)

            splitter.AppendWindow(panel)

#----------------------------------------------------------------------
if __name__ == "__main__":
    app = wx.App(False)

    frame = MyFrame()
    app.SetTopWindow(frame)
    frame.Show()

    app.MainLoop()
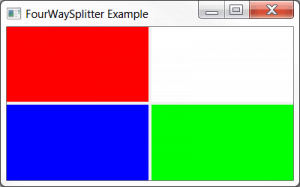
In this example, we create an instance of the FourWaySplitter and then we loop over a list of four colors. As we loop, we create a panel who’s parent is the FourWaySplitter and which gets its own unique color. Finally, we append the panel to the splitter. One thing this widget can do that a nested set of wx.SplitterWindows cannot is to resize all the panels at once. If you grab the sash at the intersection, you can resize everything. This is simply not possible with the regular splitter widget.
The MultiSplitterWindow
The MultiSplitterWindow is kind of an extension of the wx.SplitterWindow in that it allows for more than two Windows/Panels and more than one sash. Otherwise, most of the styles, constants and methods behave the same way. If you look at the wxPython demo, you’ll notice that it uses the AppendWindow in the same manner as the FourWaySplitter. Let’s create a simple demo based on the one in the official wxPython demo:
import wx
from wx.lib.splitter import MultiSplitterWindow

########################################################################
class SamplePanel(wx.Panel):
    """"""

    #----------------------------------------------------------------------
    def __init__(self, parent, colour):
        """Constructor"""
        wx.Panel.__init__(self, parent)
        self.SetBackgroundColour(colour)

########################################################################
class MainFrame(wx.Frame):
    """"""

    #----------------------------------------------------------------------
    def __init__(self):
        """Constructor"""
        wx.Frame.__init__(self, None, title="MultiSplitterWindow Tutorial")

        splitter = MultiSplitterWindow(self, style=wx.SP_LIVE_UPDATE)

        colours = ["pink", "yellow", "sky blue", "Lime Green"]
        for colour in colours:
            panel = SamplePanel(splitter, colour)
            splitter.AppendWindow(panel)

        self.Show()

#----------------------------------------------------------------------
if __name__ == "__main__":
    app = wx.App(False)
    frame = MainFrame()
    app.MainLoop()
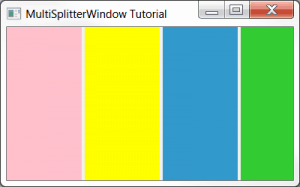
As you can see, all you need to do to add “windows” or panels is to add them to the splitter using its AppendWindow method. In this case, we just appended four different panels that each had a different background colour.
Wrapping Up
It should be noted that the panels you add to the MultiSplitterWindow or the FourWaySplitter can have other widgets in them just as in the first example with the SplitterWindow. With these widgets (or combinations of these widgets) you can create very complex and flexible interfaces. One of the applications I see that uses these types of widgets the most is an FTP client like Filezilla. However most photography software has movable sashes to expand options on the right or left or on the bottom as well. I recommend trying to replicate some of these other programs to help you learn how to use these widgets effectively.
Additional Reading
- wx.SplitterWindow documentation
- FourWaySplitter documentation
- The MultiSplitter documentation
Source Code


Pingback: Mike Driscoll: wxPython: An Introduction to SplitterWindows | The Black Velvet Room
Cool!
How to split a frame to two panels, which are equal in size??
Try using
SetSashGravity(0.5)
Hi, I’m new using wxpython.
I used your code to generate a splitter window, but in the left panel I created a listbox and in the right panel I created a button.
What I would like to do is that when I press my button in the right panel, my list in the left panel display the string “Hello World”.
I’ve tried the following:
import wx
########################################################################
class LeftPanel(wx.Panel):
“”””””
#———————————————————————-
def __init__(self, parent):
“””Constructor”””
wx.Panel.__init__(self, parent=parent)
self.lizt = wx.ListBox(self, -1, pos = wx.DefaultPosition, size = (300, 120), choices = “”, style = wx.LB_SINGLE|wx.LB_HSCROLL|wx.LB_SORT, name = “aDB”)
sizer = wx.BoxSizer(wx.VERTICAL)
sizer.Add(self.lizt, 0, wx.EXPAND)
self.SetSizer(sizer)
########################################################################
class RightPanel(wx.Panel):
“”””””
#———————————————————————-
def __init__(self, parent):
“””Constructor”””
wx.Panel.__init__(self, parent=parent)
txt = wx.Button(self, wx.ID_ANY, “txt”)
txt.SetLabel(“ALL”)
txt.Bind(wx.EVT_BUTTON, self.write, txt)
def write(self, event):
LeftPanel.lizt.Clear()
LeftPanel.lizt.Append(“HELLO WORLD”)
return
########################################################################
class MyForm(wx.Frame):
#———————————————————————-
def __init__(self):
wx.Frame.__init__(self, None, title=”Splitter Tutorial”)
splitter = wx.SplitterWindow(self)
leftP = LeftPanel(splitter)
rightP = RightPanel(splitter)
# split the window
splitter.SplitVertically(leftP, rightP)
splitter.SetSashGravity(0.5)
sizer = wx.BoxSizer(wx.VERTICAL)
sizer.Add(splitter, 1, wx.EXPAND)
self.SetSizer(sizer)
#———————————————————————-
# Run the program
if __name__ == “__main__”:
app = wx.App(False)
frame = MyForm()
frame.Show()
app.MainLoop()
But I get this Error: AttributeError: type object ‘LeftPanel’ has no attribute ‘lizt’
What am I doing wrong 🙁
Thanks in advance