For the second half of this series, I discovered that there are even more dialogs than I originally thought. While it would have probably been a good idea to have split this into three parts, we’re going to stick with just two. In this article, we’re going to cover the following dialogs:
- GenericMessageDialog (AGW)
- ImageDialog
- wx.MultiChoiceDialog
- wx.PageSetupDialog
- wx.PrintDialog
- wx.ProgressDialog
- PyBusyInfo (AGW)
- PyProgress (AGW)
- ScrolledMessageDialog
- wx.SingleChoiceDialog
- wx.TextEntryDialog
For the uninitiated, there’s also an AboutBox dialog that’s not here for the very simple reason that it’s already been covered in this blog outside of this series. Check that out for yourself. Just to clear up any confusion about why wx.Dialog isn’t here: this series ONLY covers pre-built dialogs. The wx.Dialog widget is great for creating your own custom dialogs. The last note that should be covered is that the example code here has been yanked from the wxPython demo and re-purposed for this article.
Now, on with the show!
The GenericMessageDialog
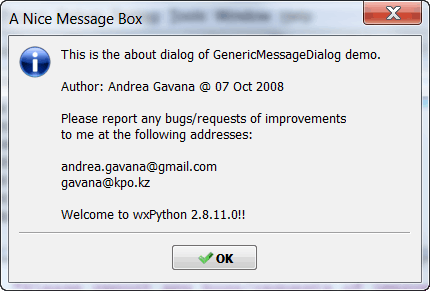
The GenericMessageDialog is a part of the AGW library of generic controls created by Andrea Gavana. It gives us more options than the MessageDialog itself did because the GenericMessageDialog is written in pure python and is therefore, much more hackable. Let’s see how we can create the dialog in the screenshot:
import images
import wx
import wx.lib.agw.genericmessagedialog as GMD

_msg = "This is the about dialog of GenericMessageDialog demo.\n\n" + \
       "Author: Andrea Gavana @ 07 Oct 2008\n\n" + \
       "Please report any bugs/requests of improvements\n" + \
       "to me at the following addresses:\n\n" + \
       "andrea.gavana@gmail.com\n" + "gavana@kpo.kz\n\n" + \
       "Welcome to wxPython " + wx.VERSION_STRING + "!!"

########################################################################
class MyForm(wx.Frame):
    """
    Based on Andrea Gavana's demo from the wxPython Demo
    """

    #----------------------------------------------------------------------
    def __init__(self):
        wx.Frame.__init__(self, None, wx.ID_ANY,
                          "Generic Message Dialog Tutorial",
                          size=(575,225))

        self.mainPanel = wx.Panel(self)
        self.buttonSizer_staticbox = wx.StaticBox(self.mainPanel, -1, "Buttons Styles")
        self.ok = wx.CheckBox(self.mainPanel, -1, "wx.OK")
        self.yes_no = wx.CheckBox(self.mainPanel, -1, "wx.YES_NO")
        self.cancel = wx.CheckBox(self.mainPanel, -1, "wx.CANCEL")
        self.yes = wx.CheckBox(self.mainPanel, -1, "wx.YES")
        self.no = wx.CheckBox(self.mainPanel, -1, "wx.NO")
        self.no_default = wx.CheckBox(self.mainPanel, -1, "wx.NO_DEFAULT")
        self.help = wx.CheckBox(self.mainPanel, -1, "wx.HELP")
        self.dialogStyles = wx.RadioBox(self.mainPanel, -1, "Dialog Styles",
                                        choices=["wx.ICON_INFORMATION", "wx.ICON_WARNING",
                                                 "wx.ICON_EXCLAMATION", "wx.ICON_ERROR",
                                                 "wx.ICON_QUESTION"],
                                        majorDimension=5, style=wx.RA_SPECIFY_ROWS)
        self.showDialog = wx.Button(self.mainPanel, -1, "Show GenericMessageDialog")

        self.SetProperties()
        self.DoLayout()

        self.Bind(wx.EVT_BUTTON, self.OnShowDialog, self.showDialog)
        self.Bind(wx.EVT_CHECKBOX, self.OnCheckBox)


    def SetProperties(self):

        self.ok.SetValue(1)
        self.dialogStyles.SetSelection(0)
        self.showDialog.SetDefault()


    def DoLayout(self):

        frameSizer = wx.BoxSizer(wx.VERTICAL)
        mainSizer = wx.BoxSizer(wx.HORIZONTAL)
        buttonSizer = wx.StaticBoxSizer(self.buttonSizer_staticbox, wx.VERTICAL)
        buttonSizer.Add(self.ok, 0, wx.LEFT|wx.RIGHT|wx.TOP, 5)
        buttonSizer.Add((0, 2), 0, 0, 0)
        buttonSizer.Add(self.yes_no, 0, wx.LEFT|wx.RIGHT, 5)
        buttonSizer.Add((0, 2), 0, 0, 0)
        buttonSizer.Add(self.cancel, 0, wx.LEFT|wx.RIGHT, 5)
        buttonSizer.Add((0, 2), 0, 0, 0)
        buttonSizer.Add(self.yes, 0, wx.LEFT|wx.RIGHT, 5)
        buttonSizer.Add((0, 2), 0, 0, 0)
        buttonSizer.Add(self.no, 0, wx.LEFT|wx.RIGHT, 5)
        buttonSizer.Add((0, 2), 0, 0, 0)
        buttonSizer.Add(self.no_default, 0, wx.LEFT|wx.RIGHT, 5)
        buttonSizer.Add((0, 2), 0, 0, 0)
        buttonSizer.Add(self.help, 0, wx.LEFT|wx.RIGHT|wx.BOTTOM, 5)
        mainSizer.Add(buttonSizer, 0, wx.ALL, 5)
        mainSizer.Add(self.dialogStyles, 0, wx.ALL, 5)
        mainSizer.Add((10, 0), 0, 0, 0)
        mainSizer.Add(self.showDialog, 0, wx.ALL|wx.ALIGN_CENTER_HORIZONTAL, 10)
        mainSizer.Add((10, 0), 0, 0, 0)
        self.mainPanel.SetSizer(mainSizer)

        frameSizer.Add(self.mainPanel, 1, wx.EXPAND)
        self.SetSizer(frameSizer)
        frameSizer.Layout()


    def OnCheckBox(self, event):

        obj = event.GetEventObject()
        widgets = [self.yes, self.yes_no, self.no, self.no_default]
        if not event.IsChecked():
            return

        if obj == self.ok:
            for checks in widgets:
                checks.SetValue(0)
        elif obj in widgets:
            self.ok.SetValue(0)


    def OnShowDialog(self, event):

        btnStyle = 0
        for child in self.mainPanel.GetChildren():
            if isinstance(child, wx.CheckBox):
                if child.GetValue():
                    btnStyle |= eval(child.GetLabel())

        dlgStyle = eval(self.dialogStyles.GetStringSelection())
        dlg = GMD.GenericMessageDialog(self, _msg,
                                       "A Nice Message Box",
                                       btnStyle | dlgStyle)
        dlg.SetIcon(images.Mondrian.GetIcon())
        dlg.ShowModal()
        dlg.Destroy()

# Run the program
if __name__ == "__main__":
    app = wx.App(False)
    frame = MyForm()
    frame.Show()
    app.MainLoop()
The first thing to look for in any example is what is imported at the top of the file. In this case, we use the images.py file from the wxPython demo to supply some of the images in this example. We also import the dialog that we need from wx.lib.agw.genericmessagedialog. We can skip the frame’s initialization code since we want to focus on the dialog. The first dialog related method we see is SetProperties. It sets up a few default options in the dialog, like checking the “ok” checkbox, selecting the first radio button and putting the focus on the button that will open the generic dialog. The first two will tell our dialog creator method, OnShowDialog, what kind of dialog we want. Thus, our next method to look at is the OnShowDialog one.
Here we find that the GenericMessageDialog takes mostly the same values that a normal MessageDialog would, namely a parent, message, title caption, and some styles. You can also set its size, pos and agwstyle when applicable. We can also add an icon to the dialog by calling SetIcon. There you have it! A generic message dialog!
View Images with ImageDialog
The ImageDialog is a handy little dialog that you can use to preview various image formats. This dialog is another generic dialog, but it’s not part of the AGW library. The ImageDialog is quite handy and super easy to create. How easy? Well check out the code below and see for yourself!
import os
import wx
import wx.lib.imagebrowser as ib

########################################################################
class MyForm(wx.Frame):

    #----------------------------------------------------------------------
    def __init__(self):
        wx.Frame.__init__(self, None, wx.ID_ANY,
                          "ImageDialog Tutorial")
        panel = wx.Panel(self, wx.ID_ANY)
        b = wx.Button(panel, label="Create and Show a ImageDialog")
        b.Bind(wx.EVT_BUTTON, self.onButton)

        sizer = wx.BoxSizer(wx.VERTICAL)
        sizer.Add(b, 0, wx.ALL|wx.CENTER, 5)
        panel.SetSizer(sizer)

    #----------------------------------------------------------------------
    def onButton(self, event):
        """
        Based on the wxPython demo by the same name
        """
        # get current working directory
        dir = os.getcwd()

        # set the initial directory for the demo bitmaps
        initial_dir = os.path.join(dir, 'bitmaps')

        # open the image browser dialog
        dlg = ib.ImageDialog(self, initial_dir)

        dlg.Centre()

        if dlg.ShowModal() == wx.ID_OK:
            # show the selected file
            print "You Selected File: " + dlg.GetFile()
        else:
            print "You pressed Cancel"

        dlg.Destroy()

#----------------------------------------------------------------------
# Run the program
if __name__ == "__main__":
    app = wx.App(False)
    frame = MyForm()
    frame.Show()
    app.MainLoop()
If you look in the onButton method, you can see how we initialize this dialog. Basically all you need to feed the control is a parent and a directory full of images, then show the dialog. That’s it! Didn’t I tell you it was easy?
Making Choices with wx.MultiChoiceDialog
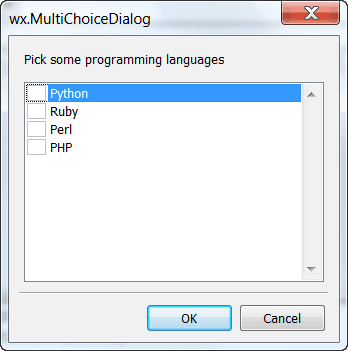
What do you do if you need to ask the user for one or more pieces of simple information? You can create your own control or you might choose the wx.MultiChoiceDialog. The MultiChoiceDialog provides you the ability to serve up a dialog that allows the user to choose multiple choices. Yes, it is pretty obvious…so on to the code!
import wx

########################################################################
class MyForm(wx.Frame):

    #----------------------------------------------------------------------
    def __init__(self):
        wx.Frame.__init__(self, None, wx.ID_ANY,
                          "MultiChoiceDialog Tutorial")
        panel = wx.Panel(self, wx.ID_ANY)
        b = wx.Button(panel, label="Create and Show a wx.MultiChoiceDialog")
        b.Bind(wx.EVT_BUTTON, self.onButton)

        sizer = wx.BoxSizer(wx.VERTICAL)
        sizer.Add(b, 0, wx.ALL|wx.CENTER, 5)
        panel.SetSizer(sizer)

    #----------------------------------------------------------------------
    def onButton(self, event):
        """
        Based on the wxPython demo - opens the MultiChoiceDialog
        and prints the user's selection(s) to stdout
        """
        lst = ["Python", "Ruby", "Perl", "PHP"]
        dlg = wx.MultiChoiceDialog( self,
                                   "Pick some programming languages",
                                   "wx.MultiChoiceDialog", lst)

        if (dlg.ShowModal() == wx.ID_OK):
            selections = dlg.GetSelections()
            strings = [lst[x] for x in selections]
            print "You chose:" + str(strings)

        dlg.Destroy()

#----------------------------------------------------------------------
# Run the program
if __name__ == "__main__":
    app = wx.App(False)
    frame = MyForm()
    frame.Show()
    app.MainLoop()
The MultiChoiceDialog is like most dialogs. It accepts a parent, descriptive label, window caption and a list of choices. To get the user’s selections, all you need to do is call the dialog’s GetSelections method. That’s it!
wx.PageSetupDialog
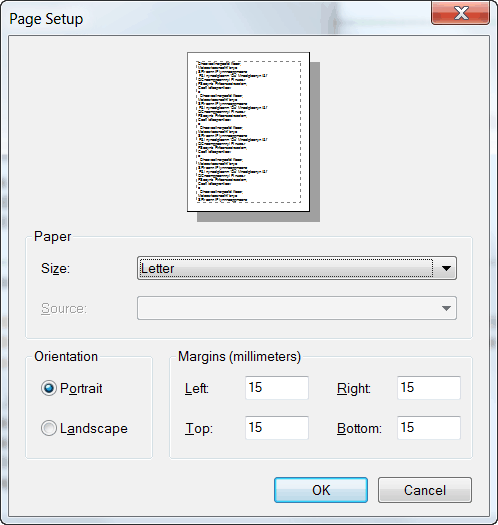
The wx.PageSetupDialog is used for setting up a few parameters for printing out a page or just setting up a page for editing. You can use it to adjust paper size, margins and whether or not the page should be in landscape or portrait orientations. Here’s how you set one up:
import wx

########################################################################
class MyForm(wx.Frame):

    #----------------------------------------------------------------------
    def __init__(self):
        wx.Frame.__init__(self, None, wx.ID_ANY,
                          "PageSetupDialog Tutorial")
        panel = wx.Panel(self, wx.ID_ANY)
        b = wx.Button(panel, label="Create and Show a PageSetupDialog")
        b.Bind(wx.EVT_BUTTON, self.onButton)

        sizer = wx.BoxSizer(wx.VERTICAL)
        sizer.Add(b, 0, wx.ALL|wx.CENTER, 5)
        panel.SetSizer(sizer)

    #----------------------------------------------------------------------
    def onButton(self, event):
        """
        Based on the wxPython demo - sets some default values for the
        PageSetupDialog, then opens it. If the user presses OK, the
        user's choices are extracted and printed to stdout
        """
        data = wx.PageSetupDialogData()
        data.SetMarginTopLeft( (15, 15) )
        data.SetMarginBottomRight( (15, 15) )
        #data.SetDefaultMinMargins(True)
        data.SetPaperId(wx.PAPER_LETTER)

        dlg = wx.PageSetupDialog(self, data)

        if dlg.ShowModal() == wx.ID_OK:
            data = dlg.GetPageSetupData()
            tl = data.GetMarginTopLeft()
            br = data.GetMarginBottomRight()
            print 'Margins are: %s %s\n' % (str(tl), str(br))

        dlg.Destroy()

#----------------------------------------------------------------------
# Run the program
if __name__ == "__main__":
    app = wx.App(False)
    frame = MyForm()
    frame.Show()
    app.MainLoop()
Let’s take a gander at the onButton method. First we need to set up some defaults for the dialog, which is what the first four lines are for. Next we need to get the user’s choices, so in the conditional IF statement we see how to access a few of the settings in the dialog, such as GetMarginTopLeft or GetMarginBottomRight. You can get the other bits of information using other getters like GetPaperSize. Note that to get access to these methods you first have to create an object based on GetPageSetupData.
wx.PrintDialog
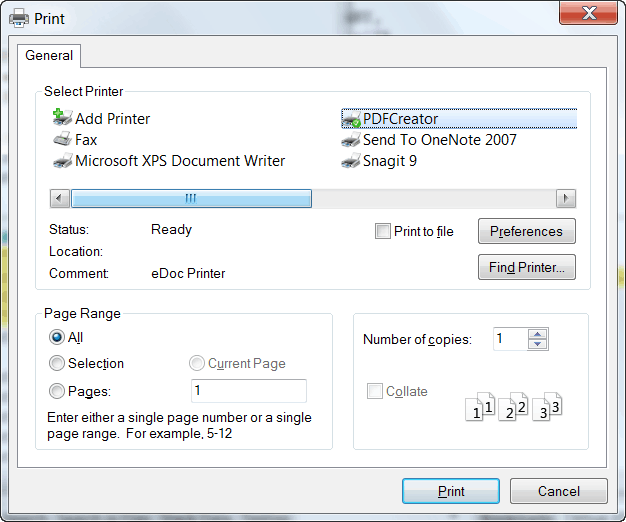
The wx.PrintDialog allows the user to choose what printer to print to and give the user the normal options that he or she would see if they were to try to print something. It’s a handy wrapper around the platform’s native print dialog. Here’s how you make one:
import wx

########################################################################
class MyForm(wx.Frame):

    #----------------------------------------------------------------------
    def __init__(self):
        wx.Frame.__init__(self, None, wx.ID_ANY,
                          "PrintDialog Tutorial")
        panel = wx.Panel(self, wx.ID_ANY)
        b = wx.Button(panel, label="Create and Show a wx.PrintDialog")
        b.Bind(wx.EVT_BUTTON, self.onButton)

        sizer = wx.BoxSizer(wx.VERTICAL)
        sizer.Add(b, 0, wx.ALL|wx.CENTER, 5)
        panel.SetSizer(sizer)

    #----------------------------------------------------------------------
    def onButton(self, evt):
        """
        Based on the wxPython demo - Sets up a few defaults for the dialog
        before showing it modally.
        """
        data = wx.PrintDialogData()

        data.EnableSelection(True)
        data.EnablePrintToFile(True)
        data.EnablePageNumbers(True)
        data.SetMinPage(1)
        data.SetMaxPage(5)
        data.SetAllPages(True)

        dlg = wx.PrintDialog(self, data)

        if dlg.ShowModal() == wx.ID_OK:
            data = dlg.GetPrintDialogData()
            print 'GetAllPages: %d\n' % data.GetAllPages()
        dlg.Destroy()

#----------------------------------------------------------------------
# Run the program
if __name__ == "__main__":
    app = wx.App(False)
    frame = MyForm()
    frame.Show()
    app.MainLoop()
Much like the PageSetupDialog, we need to set up some defaults for this dialog too. Here we set up the min and max page numbers, enable print to file, etc. When you grab the user’s choices, you might want to save them and instantiate the dialog with that information so they don’t have to re-customize their print job should they want to print it again. Anyway, to actually get the user’s choices, we call the dialog’s GetPrintDialogData method and then use the result to query the other pieces. Our example just shows how to get all the pages that will print. You can drill down to more information by doing the following:
pd = data.GetPrintData()
>>> pd.Duplex
0
>>> pd.GetFilename()
u''
>>> pd.GetOrientation()
1
>>> pd.GetPaperSize()
wx.Size(210, 297)
>>> pd.GetPrintMode()
You’ll have to refer to the documentation for wxPython, wxWidgets or maybe even your platform to figure out what some of the results mean.
wx.ProgressDialog
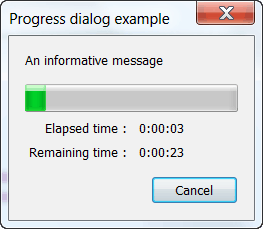
The wx.ProgressDialog can be used to show the user how far along a download is or give the user feedback about some other long running process. You could also use the wx.Gauge or PyProgress (AGW) to give the user similar information. We’ll look at that soon, but first we’re going to check out how to create the wx.ProgressDialog:
# progressDialog.py

import wx

########################################################################
class MyForm(wx.Frame):

    #----------------------------------------------------------------------
    def __init__(self):
        wx.Frame.__init__(self, None, wx.ID_ANY,
                          "ProgressDialog Tutorial")
        panel = wx.Panel(self, wx.ID_ANY)
        b = wx.Button(panel, label="Create and Show a ProgressDialog")
        b.Bind(wx.EVT_BUTTON, self.onButton)

        sizer = wx.BoxSizer(wx.VERTICAL)
        sizer.Add(b, 0, wx.ALL|wx.CENTER, 5)
        panel.SetSizer(sizer)

    #----------------------------------------------------------------------
    def onButton(self, evt):
        """
        Copied from the wxPython demo
        """
        max = 80

        dlg = wx.ProgressDialog("Progress dialog example",
                               "An informative message",
                               maximum = max,
                               parent=self,
                               style = wx.PD_CAN_ABORT
                                | wx.PD_APP_MODAL
                                | wx.PD_ELAPSED_TIME
                                #| wx.PD_ESTIMATED_TIME
                                | wx.PD_REMAINING_TIME
                                )

        keepGoing = True
        count = 0

        while keepGoing and count < max:
            count += 1
            wx.MilliSleep(250)

            if count >= max / 2:
                (keepGoing, skip) = dlg.Update(count, "Half-time!")
            else:
                (keepGoing, skip) = dlg.Update(count)

        dlg.Destroy()

#----------------------------------------------------------------------
# Run the program
if __name__ == "__main__":
    app = wx.App(False)
    frame = MyForm()
    frame.Show()
    app.MainLoop()
As you can see, the ProgressDialog accepts the following arguments: window caption, message, amount of time to run, parent, and various styles. We added the wx.PD_CAN_ABORT style to allow us to abort the dialog. The rest of the styles and methods are pretty self-explanatory.
PyBusyInfo (AGW)
In the previous article, we covered the BusyDlg. Well, Andrea Gavana went and wrote a pure python version of that virtually unknown dialog that gives us the ability to add an image! And since it’s python, we can add other features to it quite easily. Here’s how you create one:
import images
import wx
import wx.lib.agw.pybusyinfo as PBI

########################################################################
class MyForm(wx.Frame):

    #----------------------------------------------------------------------
    def __init__(self):
        wx.Frame.__init__(self, None, wx.ID_ANY,
                          "PyBusyInfo Tutorial")
        panel = wx.Panel(self, wx.ID_ANY)
        b = wx.Button(panel, label="Test PyBusyInfo")
        b.Bind(wx.EVT_BUTTON, self.onButton)

        sizer = wx.BoxSizer(wx.VERTICAL)
        sizer.Add(b, 0, wx.ALL|wx.CENTER, 5)
        panel.SetSizer(sizer)

    #----------------------------------------------------------------------
    def onButton(self, event):
        """
        Based on the wxPython demo by the same name
        """
        event.Skip()
        message = "Please wait 5 seconds, working..."
        busy = PBI.PyBusyInfo(message, parent=None, title="Really Busy",
                              icon=images.Smiles.GetBitmap())

        wx.Yield()

        for indx in xrange(5):
            wx.MilliSleep(1000)

        del busy

#----------------------------------------------------------------------
# Run the program
if __name__ == "__main__":
    app = wx.App(False)
    frame = MyForm()
    frame.Show()
    app.MainLoop()
Note that the PyBusyInfo also has an oddball method of destroying the dialog. In this case, we call python’s builtin, “del”. Hopefully Mr. Gavana will add a Destroy() method to it so the dialog can be destroyed in the standard way. Also notice how we add the icon by just passing it in with the icon parameter.
PyProgress (AGW)
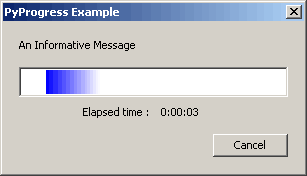
The PyProgress dialog comes to us courtesy of the industrious Andrea Gavana. Yes, it’s another AGW library widget, which means it’s also pure python. It looks a little different than the wx.ProgressDialog. Hopefully you’ll like its aesthetics too. Let’s find out how to make one of our own:
import images
import wx
import wx.lib.agw.pyprogress as PP

########################################################################
class MyForm(wx.Frame):

    #----------------------------------------------------------------------
    def __init__(self):
        wx.Frame.__init__(self, None, wx.ID_ANY,
                          "PyBusyInfo Tutorial")
        panel = wx.Panel(self, wx.ID_ANY)
        b = wx.Button(panel, label="Test PyBusyInfo")
        b.Bind(wx.EVT_BUTTON, self.onButton)

        sizer = wx.BoxSizer(wx.VERTICAL)
        sizer.Add(b, 0, wx.ALL|wx.CENTER, 5)
        panel.SetSizer(sizer)

    #----------------------------------------------------------------------
    def onButton(self, event):
        """
        Based on the wxPython demo by the same name
        """
        event.Skip()
        style = wx.PD_APP_MODAL|wx.PD_ELAPSED_TIME|wx.PD_CAN_ABORT
        dlg = PP.PyProgress(None, -1, "PyProgress Example",
                            "An Informative Message",
                            style=style)
        max = 400
        keepGoing = True
        count = 0

        while keepGoing and count < max:
            count += 1
            wx.MilliSleep(30)

            if count >= max / 2:
                keepGoing = dlg.UpdatePulse("Half-time!")
            else:
                keepGoing = dlg.UpdatePulse()

        dlg.Destroy()
        wx.SafeYield()
        wx.GetApp().GetTopWindow().Raise()

#----------------------------------------------------------------------
# Run the program
if __name__ == "__main__":
    app = wx.App(False)
    frame = MyForm()
    frame.Show()
    app.MainLoop()
The code above is pretty much like all the other dialogs we’ve seen so far. Just for fun, I’ll let you figure out how this one works.
ScrolledMessageDialog
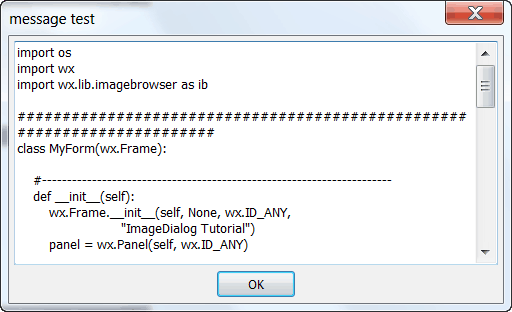
The ScrolledMessageDialog is one of the few generic dialogs that Andrea Gavana didn’t write. It’s also one of the easiest to create and use. Don’t believe me? Well, read the code below and see how wrong you are!
import wx
import wx.lib.dialogs

########################################################################
class MyForm(wx.Frame):

    #----------------------------------------------------------------------
    def __init__(self):
        wx.Frame.__init__(self, None, wx.ID_ANY,
                          "ScrolledMessageDialog Tutorial")
        panel = wx.Panel(self, wx.ID_ANY)
        b = wx.Button(panel, label="Create and Show a ScrolledMessageDialog")
        b.Bind(wx.EVT_BUTTON, self.onButton)

        sizer = wx.BoxSizer(wx.VERTICAL)
        sizer.Add(b, 0, wx.ALL|wx.CENTER, 5)
        panel.SetSizer(sizer)

    #----------------------------------------------------------------------
    def onButton(self, event):
        """
        Based on the wxPython demo by the same name
        """
        f = open("imageDialog.py", "r")
        msg = f.read()
        f.close()

        dlg = wx.lib.dialogs.ScrolledMessageDialog(self, msg, "message test")
        dlg.ShowModal()

        dlg.Destroy()

#----------------------------------------------------------------------
# Run the program
if __name__ == "__main__":
    app = wx.App(False)
    frame = MyForm()
    frame.Show()
    app.MainLoop()
As you can clearly see, all you need is some text to pass to the dialog. In this case, we read one of the other python files and passed it to the dialog. I hope you’ve been paying attention to the special imports we’ve had to do for these generic dialogs. For this one, we had to import wx.lib.dialogs to gain access to the ScrolledMessageDialog.
wx.SingleChoiceDialog
Sometimes you want to give the user a list of items, but only allow him to select one. You could use a custom wx.Dialog with a set of radio buttons or you could use the wx.SingleChoiceDialog. In case you didn’t guess, we’re going with the latter…
import wx

########################################################################
class MyForm(wx.Frame):

    #----------------------------------------------------------------------
    def __init__(self):
        wx.Frame.__init__(self, None, wx.ID_ANY,
                          "SingleChoiceDialog Tutorial")
        panel = wx.Panel(self, wx.ID_ANY)
        b = wx.Button(panel, label="Create and Show a SingleChoiceDialog")
        b.Bind(wx.EVT_BUTTON, self.onButton)

        sizer = wx.BoxSizer(wx.VERTICAL)
        sizer.Add(b, 0, wx.ALL|wx.CENTER, 5)
        panel.SetSizer(sizer)

    #----------------------------------------------------------------------
    def onButton(self, event):
        """
        Based on the wxPython demo by the same name
        """
        dlg = wx.SingleChoiceDialog(
                self, "What's your favorite langauge?", 'The Caption',
                ["C++", "VB", "Python", "Perl", "Ruby", "FoxPro"],
                wx.CHOICEDLG_STYLE
                )

        if dlg.ShowModal() == wx.ID_OK:
            print 'You selected: %s\n' % dlg.GetStringSelection()

        dlg.Destroy()

#----------------------------------------------------------------------
# Run the program
if __name__ == "__main__":
    app = wx.App(False)
    frame = MyForm()
    frame.Show()
    app.MainLoop()
Here the SingleChoiceDialog accepts most of the same arguments that the other dialogs have taken. Take note that we need to pass a list in to create the list of choices and the wx.CHOICEDLG_STYLE style to make the dialog function correctly. Other than that, we’ve been there, done that.
wx.TextEntryDialog
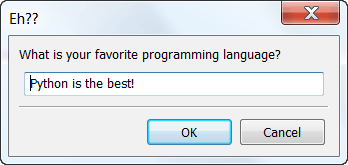
The wx.TextEntryDialog gives us the ability to allow the user to tell us whatever he wants. Yes, that is scary, but sometimes you just have to do it. You might use this dialog to get non-specific comments or feedback from your venerable users. Here’s how you can do it:
import wx

########################################################################
class MyForm(wx.Frame):

    #----------------------------------------------------------------------
    def __init__(self):
        wx.Frame.__init__(self, None, wx.ID_ANY,
                          "TextEntryDialog Tutorial")
        panel = wx.Panel(self, wx.ID_ANY)
        b = wx.Button(panel, label="Create and Show a TextEntryDialog")
        b.Bind(wx.EVT_BUTTON, self.onButton)

        sizer = wx.BoxSizer(wx.VERTICAL)
        sizer.Add(b, 0, wx.ALL|wx.CENTER, 5)
        panel.SetSizer(sizer)

    #----------------------------------------------------------------------
    def onButton(self, event):
        """
        Based on the wxPython demo by the same name
        """
        dlg = wx.TextEntryDialog(
                self, 'What is your favorite programming language?',
                'Eh??', 'Python')

        dlg.SetValue("Python is the best!")

        if dlg.ShowModal() == wx.ID_OK:
            print "you accepted!"
        dlg.Destroy()

#----------------------------------------------------------------------
# Run the program
if __name__ == "__main__":
    app = wx.App(False)
    frame = MyForm()
    frame.Show()
    app.MainLoop()
Here we see that the dialogs arguments include the following: parent, message, caption, defaultValue. Of course, we override the defaultValue when we call the dialog’s SetValue() method. The rest of the code should look familiar.
Wrapping up
If you made it this far, congratulations! You just slogged through one of the longest posts ever written on this site! You should now be an expert in wxPython dialogs. If you want even more information, feel free to read the many references below to continue your education. And get out there and start using these dialogs to great effect!
Note: I didn’t use anything other than the wxPython demo, Wingware’s IDE and few documentation pages in writing this article.
Additional Reading
- GenericMessageDialog – Official documentation , Gavana’s Docs, something with the same name from the wxPython Wiki
- ImageDialog – Official documentation, some java site
- wx.MultiChoiceDialog – Official documentation
- wx.PageSetupDialog – Official documentation, Andrea Gavana’s documentation for this widget
- wx.PrintDialog – Official documentation, printing wiki page
- wx.ProgressDialog – Official documentation
- PyBusyInfo – Andrea Gavana’s Docs
- PyProgress – Official documentation, Andrea Gavana’s docs
- ScrolledMessageDialog – Official documentation, wiki example
- wx.SingleChoiceDialog – Official documentation
- wx.TextEntryDialog – Official documentation
More Reading
- The first part of this series
- Devshed’s dialog article
- SciPy’s dialog cookbook page
- Zetcode’s dialog article
Downloads
Note: This code was tested on the following:
- Windows XP Professional, wxPython 2.8.10.1 / 2.8.11.0, Python 2.5
- Windows 7 Home Edition, wxPython 2.8.10.1, Python 2.6




Thanks again for your work
Wow, so many AGW entries in this series 😉 . Excellent wrap-up of wx.Dialog-based widgets, I learnt something I didn’t know too. Keep up the good job!
Andrea,
Thanks! I’m glad you like it. I’ve still got a lot of AGW stuff to figure out and write about…
– Mike